
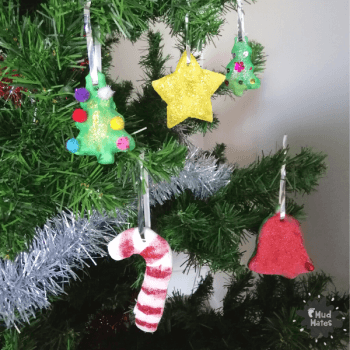
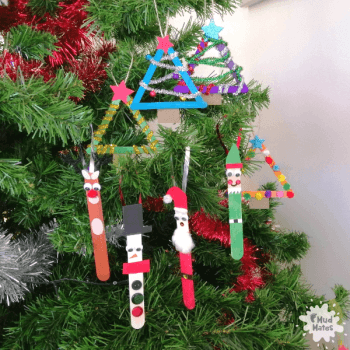
How cute are these ice block stick Christmas decorations? The kids and I had so much fun making these. They look fantastic hanging on our tree and the kids are gifting some to friends and family as Christmas gifts.
We made Christmas trees and Christmas characters – Santa, Rudolph, a Snowman and an Elf.
ICE BLOCK STICK CHRISTMAS TREE DECORATIONS
What you’ll need:
- Coloured ice block sticks (normal size)
- Coloured pipe cleaners
- Star stickers
- Bells
- Mini pom poms
- String or ribbon
- Glue
- Brown card
- Scissors
How to make ice block stick Christmas trees:
- Glue the ice block sticks together to make a triangle. Leave to dry before decorating.
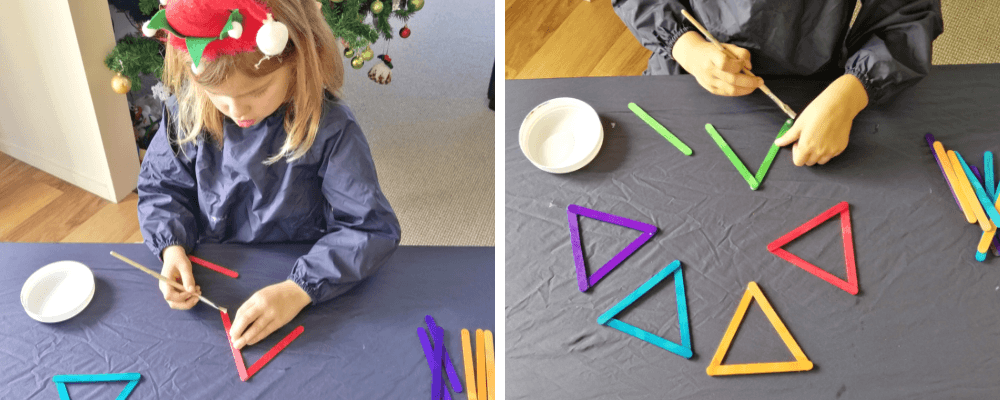
- Cut some string or ribbon and glue this to the top of the triangle. Stick a star sticker over the top to help it stay in place.
- Cut a rectangle from the brown card and glue to the bottom of the triangle as the tree trunk.
Then it’s time to get creative!
My children are older (8 and 6) so I simply showed them an example of mine I had prepared earlier and let them create their Christmas trees themselves.
The bells are threaded on to the pipe cleaner before winding them around the ice block sticks.
Younger children may need more assistance.

ICE BLOCK STICK CHRISTMAS CHARACTER DECORATIONS
What you’ll need:
- Natural ice block sticks/craft sticks (the larger, wider size)
- Paint (red, green, brown, white)
- Coloured cardboard (red, green, black, light brown)
- Googly eyes
- Cotton wool
- Mini pom poms
- Sequins
- Black pipe cleaners
- Small buttons
- Ribbon
- Glue
- Scissors
How to make ice block stick Christmas characters:
- Paint the ice block sticks on both sides (ours needed two coats). For the green elf sticks only paint two-thirds of the way, leaving the top natural for the face (you can also do this for Santa, but we forgot and painted the whole stick).

- Once the paint has dried help your children prepare the cardboard pieces for the characters, based on the image below.
- I drew the shapes on the cardboard and Miss 6 cut the pieces out. Cut and glue a piece of white card on to the top of the red stick for Santa’s face.
- Cut the ribbon for the tags and for the Santa, Snowman and Elf glue on the front of the sticks. Then glue their cardboard hats on top to help the ribbon stay in place.
- For Rudolph, glue the ribbon to the back of the stick. Use a pipe cleaner to make his antlers and glue these on the back of the stick too.
- Glue all the embellishments onto the sticks.

Check out our blog for more fun Christmas craft ideas…. Fingerprint Christmas Cards, Paper Plate Christmas Trees and Handprint Christmas Wreaths.
For messy play inspiration and kid friendly activities sign up to our newsletter.
You can also follow us on Facebook, Instagram and Pinterest for more inspiration.
YOU MIGHT ALSO LIKE...
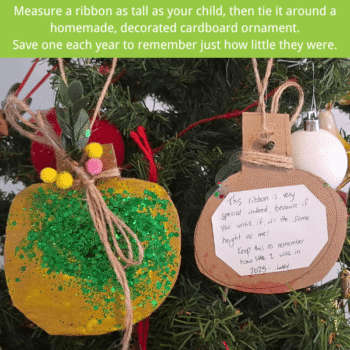
Ribbon Height Keepsake Christmas Ornament
This simple Christmas craft is a fun way to get creative with your kids while [...]

Christmas Chalk Pastel Art
Looking for a festive activity to keep the kids entertained this holiday season? Christmas chalk [...]
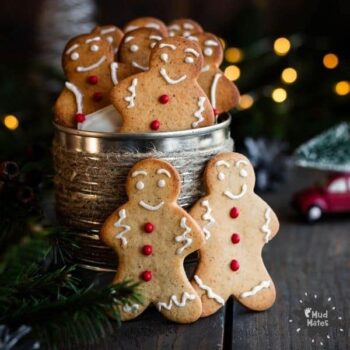
Run Run Gingerbread Men Cookies
If the story wasn’t good enough (which it is), then there’s the delicious gingerbread men [...]
No Bake Christmas Cookies
With Santa on his way, we thought it was time to share with you one [...]
Ice Cream Cone Christmas Trees
These ice cream cone Christmas trees look so cool but are super simple to do [...]
How to Make Salt Dough Christmas Ornaments
I honestly have to say, I love making salt dough Christmas ornaments with my kids! [...]
Ice Block Stick Christmas Decorations
How cute are these ice block stick Christmas decorations? The kids and I had so [...]
3 Comments
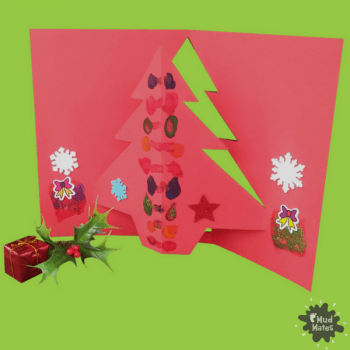
Pop Up Christmas Tree Cards
These 3D pop up Christmas tree cards are super fun to make and decorate. The [...]
2 Comments
Wonderful idea! I’m doing this with the kids next year – crafty and cute.
Great idea and good instructions!
Thanks, MudMates
Christmas decorating hasn’t started in our house yet as we have one more birthday to get through this weekend first, then we’ll switch to Christmas mode. These are so cute! and look super easy but fun to do with the kids.